For the fifth week of this digital product experiment, my focus was on refining the mostly finished product prototype, gathering feedback on it, and getting started on creating the assets for the sales page.
Although all the components for the Fantasy Character Creator were already in place, I still needed to determine how to organize them so that the user could view them effectively. One feature I added was labels for the user to see the name of each item, allowing them to know which layers to select to move it. With this done, the product was finally ready to be seen by others.
While I had my brother review it while I was still working on all the parts, it was a very brief look-over. He did give helpful feedback, but I needed some more. First, I showed my mom, who is not part of my target audience in any way, but any pair of eyes is still better than none. She said that the toolkit looked nice and agreed with the decision to make labels. A prior version had longer and more precise labels; for example, it would say “fang_1a & b” instead of just “fang 1.” She agreed that the shorter names would make the organization of the entire composition less crowded.
To gather further feedback and audience-focused insights, I decided to message my friend, who is also a digital artist who uses Clip Studio Paint. Through email, I sent them the Clip Studio File versions of the Toolkits and the instructions. On their own time, both were able to review the files and provide me with their feedback.
My first friend to test it out, Joymae, emailed me a typed document with their feedback, which was honestly entertaining for me to read. They were purposely goofy with it, but they still gave constructive feedback. As a digital artist, they appreciate that the toolkit is built in pre-existing creative software, allowing users to have more creative freedom. This was precisely my goal in hosting the character creator in creative software.

They did express difficulty transforming the smaller parts without zooming in on the canvas. While this could potentially be fixed by upscaling all the parts, I do not really think it is a necessary change. Zooming in allows the user to take a closer look at the hard work I put into creating the graphics.
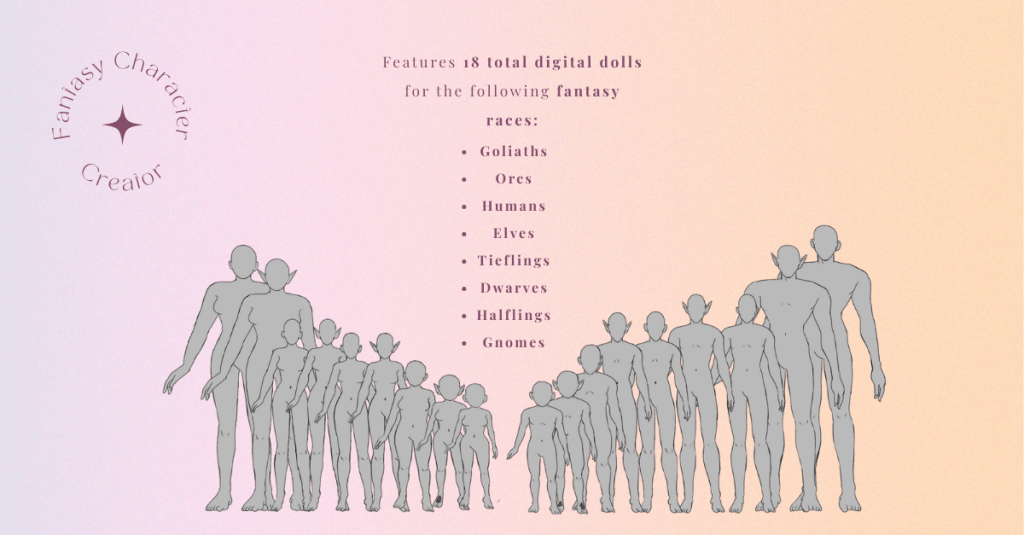
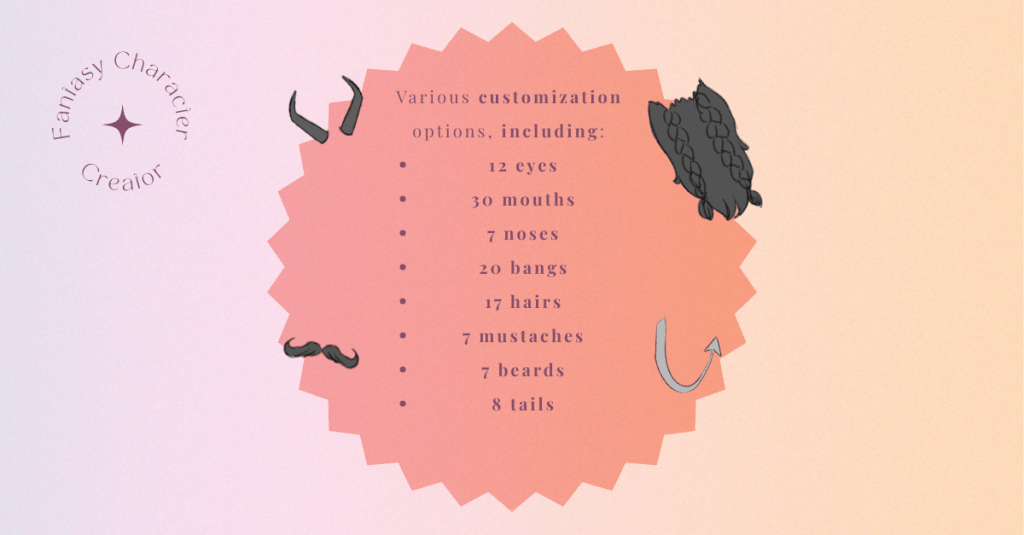
Another part of the product creation process I focused on this week was creating the assets for the sales page, which involved selecting the information and images to be displayed on the store page for the toolkit. This was done not only to inform potential customers about the product but also to persuade them to make a purchase. To inform myself about the best ways to do this, I reviewed my prior research on similar products and continued to explore the topic.
Two specific products I had looked at before that did greatly inspire my choice in a digital product are the male and female fantasy portrait creators. Both creators have a detailed paragraph about the product, along with images showcasing the various parts of the product, including the specifics of the number of items included within the product. For example, the female creator has a total of 271 stamp brushes, while the male creator has 250 stamp brushes. For each, the exact type of stamp and the number of different ones are specified. For example, the female creator has 15 body shape stamps, five face stamps, 20 nose stamps, 27 lip stamps, 28 eye stamps, and so on. Other character toolkits I found used similar methods for advertising their product, such as this Custom Character Creation Toolkit. For my own storefront, I plan to create similar advertising images that clearly outline the contents of this toolkit.
Another product I have looked at before is the Character Creation Toolkit for Ladies. This toolkit uses a similar approach to mine, utilizing PNG images that users can piece together to create their character. In the promotional images, it previews the steps of creating a character in a straightforward image and shows the user exactly what the layers look like when using the program. Similarly, I plan to include an image that showcases the organization of layers in both Clip Studio Paint and Adobe Photoshop, as well as a preview of the folders containing the PNG file versions.
Almost all of the assets for the sales page are created, and I even have a BuyMeCoffee already set up. (I have pivoted from Creative Market, because I think I can build a business better on BuyMeCoffee than on Creative Market.) The last asset that I need to create is a video instruction for the toolkit. Even this asset, I am no longer sure, is required as I think the written instructions are clear enough. At the same time, there is no harm in ensuring the instructions are as clear as possible by providing both written and video instructions.
Whether or not I create the video instructions, the Fantasy Character Creator Toolkit is nearing its launch.
REFERENCE:
J, Capps. Personal Communication. September 26, 2025. https://docs.google.com/document/d/1GIV212tgcPCP5VJL9ttX7pFHvV9l32asU2TXjftbF4k/edit?tab=t.0#heading=h.5528pejypb8v
PRODUCTS REFERENCED:
https://creativemarket.com/AlexandraArt/15944389-PROCREATE-FANTASY-WOMEN-PORTRAIT
https://creativemarket.com/AlexandraArt/13422605-PROCREATE-PS-FANTASY-MEN-PORTRAIT
https://elements.envato.com/character-creation-toolkit-ladies-H42R2X
https://elements.envato.com/custom-character-creation-kit-AXD3Ypr2
